Create an object record
Learn how to catalogue an object record, save it, publish to eHive, and add images and documents.
Overview
There are six main steps to creating an object record:
-
Log in to My eHive.
-
Select Create.
-
Choose a catalogue type.
-
Enter data.
-
Save and optionally publish the record.
-
Add an image, document, audio file, or video (optional).
Step 1: Log in to eHive
Step 2: On the menu, select Create
The menu is at the top of eHive when you are logged in.

Step 3: Choose a catalogue type
Choose a catalogue type that best reflects the object you are cataloguing. You can change this later.
Archaeology: For artefacts and physical remains recovered during excavations.
Archives: For material structured into different levels of cataloguing detail.
Art: For creative works.
History: For social history objects.
Library: For books and periodicals.
Natural science: For geological, botanical, and animal material.
Photography and multimedia: For photographic, video, or audio material.
For more information, see Catalogue types.
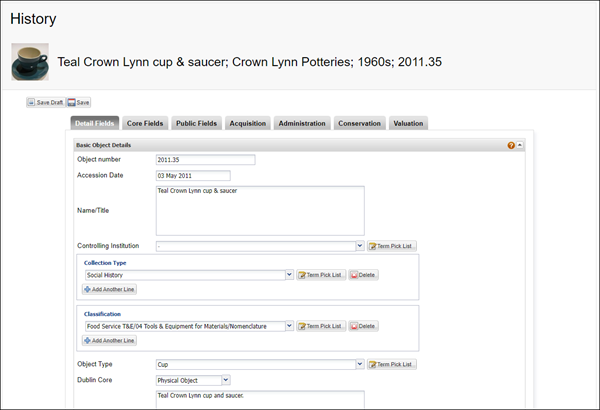
Step 4: Enter data
How the Object cataloguing page works
-
You can catalogue your object and collection management activity on the object cataloguing page.
-
The page has several tabs with different combinations of object fields.
-
When you update a field in one tab, eHive will automatically update any other tab the field appears in.
-
You can choose to see all the available cataloguing fields, the core set of fields, or only publicly displayed fields in eHive.
-
You also have four tabs to record acquisition, administration, conservation and valuation details about your object.
-
We recommend starting with the core fields. You can complete other fields later.
Tabs and fields
- Detail fields: Fields for detailed information describing the object.
-
Core fields: Key cataloguing fields to complete.
-
Public fields: Fields that are visible to the public.
-
Acquisition fields: Fields for provenance and acquisition value. You can also create a separate acquisition record.
-
Administration fields: Fields for status, rights, loans, exhibitions, deaccessions, and research.
-
Conservation fields: Fields for condition, risk, handling, storage, and treatment.
-
Valuation fields: Fields for valuation history and latest valuations.
Find out more
-
Types of fields: Learn about pick lists, text, date, number, public, and private fields.
-
Location fields: Learn about location history and current location.
-
Field help: Comprehensive descriptions of all fields, including how to use them and examples of what to enter.
Step 5: Save and optionally publish the record
See Save and publish an object record to learn how saving and publishing works in eHive.
-
You can save the record as a draft.
-
You can save the record and choose to publish it to eHive or keep it private. You can also choose to publish it to a Community.
Step 6: Add an image, document, audio file, or video
You can add images, PDF files, audio files, and videos to your object records. For more information, see:
